Guide
Aug 25, 2023
The Advanced Guide to Passwordless Authentication in Next.js
Nick Parsons
Learn how to implement passwordless authentication in Next.js using magic links, social OAuth and SAML SSO.
The password has been the bedrock of account security for decades. But their vulnerabilities are well-known. From weak password choices to recycling them across platforms, users inadvertently make it simple for bad actors to gain unauthorized access.
The concept of “passwordless authentication” has become a solution to this problem. Single Sign-Ons (SSOs), OAuth, SAML, magic links—each of these techniques can enhance user experience and increase security in your app. What has previously stopped developers is the difficulty of implementation. But with modern JavaScript libraries, these options now come out-of-the-box.
In this guide, we’ll implement passwordless authentication in Next.js all the way from creating the sign in page to testing each of the above techniques to usher in more secure, streamlined authentication.
Setting Up Next.js Application
This article will use Next.js 13 and Clerk’s Next.js SDK to create a passwordless flow. Start by creating a new Node project.
npm init -y
Create a new Next.js app. This command will use TypeScript by default, which we recommend:
npx create-next-app@latest
Once you have a Next.js application ready, you also need to install Clerk’s Next.js SDK library. The SDK contains prebuilt React components and hooks, allowing for fast time-to-market.
npm i @clerk/nextjs
Now, create a new .env.local file in the source of your project, which will contain all keys and endpoints. See keys in the Clerk dashboard.
NEXT_PUBLIC_CLERK_PUBLISHABLE_KEY=CLERK_SECRET_KEY=
Continue by mounting the <ClerkProvider> wrapper which will serve as the session and user context provider to the app.
It is advised that the <ClerkProvider> wraps the <body> element, allowing context-accesibility anywhere within the app.
// app/layout.tsximport './globals.css'import { Inter } from 'next/font/google'import { ClerkProvider } from '@clerk/nextjs'const inter = Inter({ subsets: ['latin'] })export const metadata = {title: 'Create Next App',description: 'Generated by create next app',}export default function RootLayout({children,}: {children: React.ReactNode}) {return (<ClerkProvider><html lang="en"><body className={inter.className}>{children}</body></html></ClerkProvider>)}
If you intend to use the <ClerkProvider> outside the root layout, you must ensure it is also a server component, just like the root layout.
Protect the App
After giving the app Clerk’s context, you will now create a middleware, which will dictate which page should be public and which need to be behind an authentication wall.
Create a middleware.ts file in the root folder of your app (or inside src/ if you opted for that).
import { authMiddleware } from "@clerk/nextjs";// This example protects all routes including api/trpc routes// Please edit this to allow other routes to be public as needed.// See https://clerk.com/docs/nextjs/middleware for more information about configuring your middlewareexport default authMiddleware({});export const config = {matcher: ["/((?!.*\\..*|_next).*)", "/", "/(api|trpc)(.*)"],};
This will protect your entire application. By accessing the application you will be redirected to the Sign Up page. Read more about authMiddleware to see how to make other routes public.
Implementing Magic Links in Next.js Using Clerk
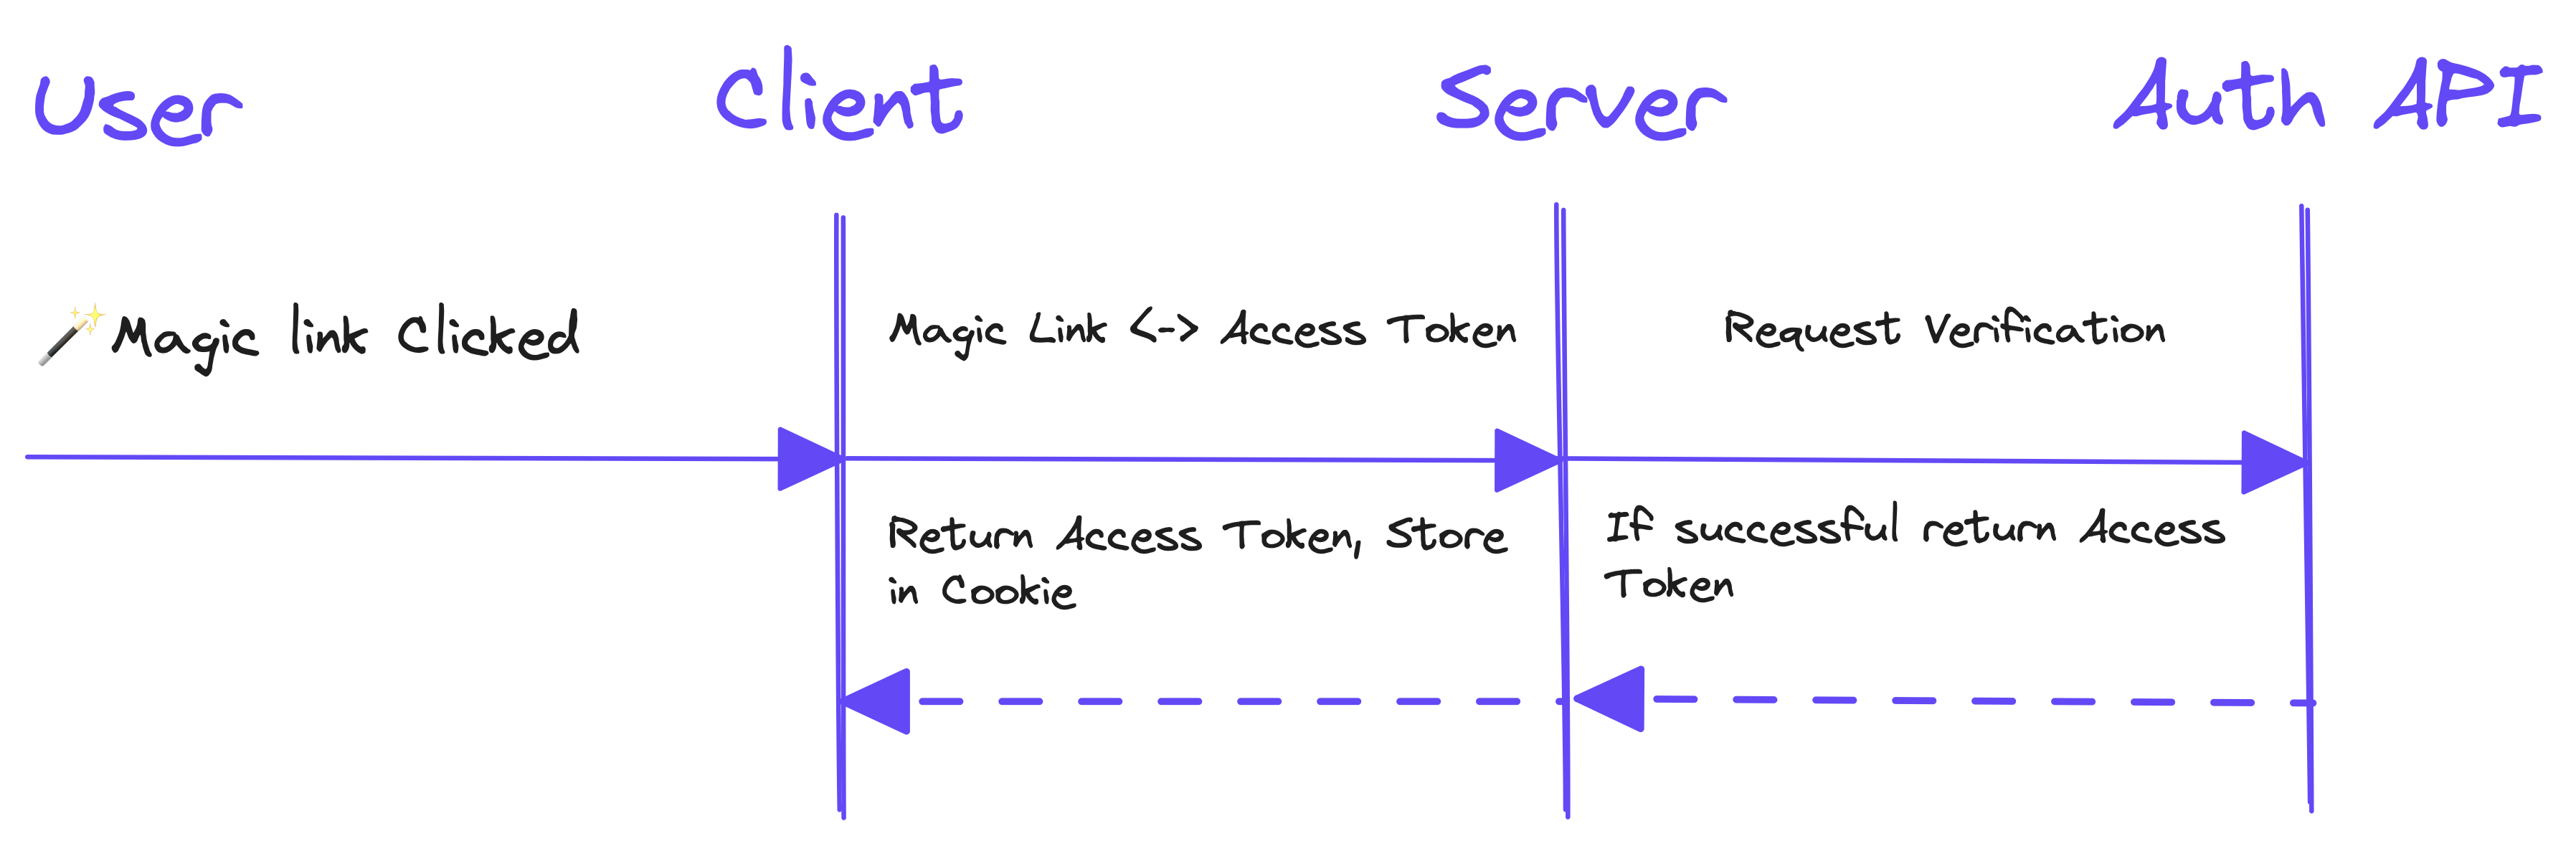
Magic links offer a seamless and secure alternative to traditional password-based authentication, elevating user convenience while bolstering security and representing a modern shift in authentication.
In this section, you will methodically explore the steps to implement magic links in Next.js through the Clerk platform.
Creating the Sign Up Page
We’ll start off by creating a simple sign up page, containing a magic link flow. Start by following the steps outlined below:
1. Create a new folder sign-up in the app folder (so app/sign-up).
2. Create a subfolder [[...sign-up]] in the sign-up folder (so app/sign-up/[[...sign-up]]). This will use Next.js optional catch-all route.
3. Create a new file page.tsx inside that subfolder (finally, app/sign-up/[[...sign-up]]/page.tsx).
4. Import the necessary dependencies:
"use client";import React from "react";import { useRouter } from "next/navigation";import {useSignUp} from "@clerk/nextjs";
5. Continue by creating a new functional component and a few hooks that will be used later down the road to conditionally render components and perform authentication:
export default function SignUp() {const [emailAddress, setEmailAddress] = React.useState("");const [expired, setExpired] = React.useState(false);const [verified, setVerified] = React.useState(false);const router = useRouter();const { signUp, isLoaded, setActive } = useSignUp();}
6. You’ll now check whether the useSignUp is loaded:
if (!isLoaded) {return null;}
7. Next, destructure methods that will be used to initiate and cancel a magic link flow:
const { startMagicLinkFlow, cancelMagicLinkFlow } =signUp.createMagicLinkFlow();
8. You’ll now create a method that will perform actual magic link flow:
async function submit(e: any) {e.preventDefault();setExpired(false);setVerified(false);if (signUp) {// Start the sign up flow, by collecting// the user's email address.await signUp.create({ emailAddress });// Start the magic link flow.// Pass your app URL that users will be navigated// when they click the magic link from their// email inbox.// su will hold the updated sign up object.const su = await startMagicLinkFlow({redirectUrl: "http://localhost:3000/verification",});// Check the verification result.const verification = su.verifications.emailAddress;if (verification.verifiedFromTheSameClient()) {setVerified(true);return;} else if (verification.status === "expired") {setExpired(true);}if (su.status === "complete") {// Sign up is complete, we have a session.// Navigate to the after sign up URL.setActive({ session: su.createdSessionId || '' })router.push("/after-sign-up");return;}}}
This method takes the inputted email address of an user and starts the magic link flow. Then, a link is sent to the given email with a specified redirect URL. Later, the method will perform verification and update the state accordingly.
9. Now, let’s add some conditional logic to render the components giving the user some input and feedback.
if (expired) {return (<div>Magic link has expired</div>);}if (verified) {return (<div>Signed in on other tab</div>);}return (<form onSubmit={submit}><inputtype="email"value={emailAddress}onChange={e => setEmailAddress(e.target.value)}/><button type="submit">Sign up with magic link</button></form>);
That’s it for the sign up page. As we specified a redirect URL above in the submit method, we also need to handle that logic.
Setting Up the Verification Page
To complete the magic link flow, we need to perform the verification that will be the final decision between authentication or denial.
1. Start by creating a new folder verification in the app folder (so, app/verification).
2. Create a new file page.tsx inside the folder (so, app/verification/page.tsx).
3. Import the dependencies:
import { MagicLinkErrorCode, isMagicLinkError, useClerk } from "@clerk/nextjs";import React from "react";
4. Next, create a functional component for the page and the hooks:
function Verification() {const [verificationStatus,setVerificationStatus,] = React.useState("loading");const { handleMagicLinkVerification } = useClerk();}
5. Now, we’ll use the useEffect hook from React to perform the flow verification.
React.useEffect(() => {async function verify() {try {await handleMagicLinkVerification({redirectUrl: "https://redirect-to-pending-sign-up",redirectUrlComplete: "https://redirect-when-sign-up-complete",});// If we're not redirected at this point, it means// that the flow has completed on another device.setVerificationStatus("verified");} catch (err: any) {// Verification has failed.let status = "failed";if (isMagicLinkError(err) && err.code === MagicLinkErrorCode.Expired) {status = "expired";}setVerificationStatus(status);}}verify();}, []);
The verification will happen on the page load, hence the useEffect hook.
6. Finish it off with some conditional rendering again:
if (verificationStatus === "loading") {return <div>Loading...</div>}if (verificationStatus === "failed") {return (<div>Magic link verification failed</div>);}if (verificationStatus === "expired") {return (<div>Magic link expired</div>);}return (<div>Successfully signed up. Return to the original tab to continue.</div>);
Testing the Magic Link Flow Integration
After writing down the code, let’s test the magic flow integration by starting up the Next.js app with the following command:
npm run dev
After the app has started, navigate to http://localhost:3000 in your browser. In the input area presented, enter a valid email address on which you will receive a magic link.

Then, press Sign up with magic link button. Shortly, an email from Clerk will arrive with the magic link for signing up.
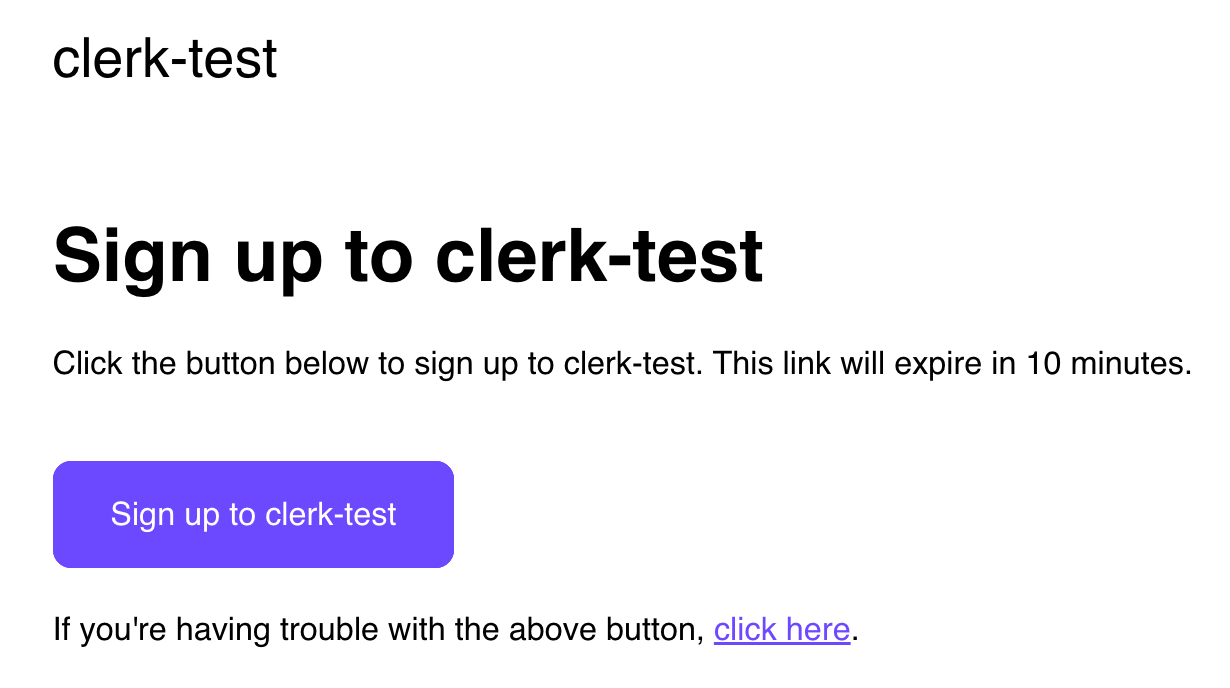
If the verification is successful, you will be presented with a confirmation message.

Implementing OAuth in Next.js Using Clerk
OAuth stands as a cornerstone in modern authentication, allowing users to securely log in using third-party accounts without sharing passwords.
When integrated effectively, it can transform the user authentication experience, making it both swift and secure.
In this section, we will delve into the intricacies of setting up OAuth, harnessing the utility of Clerk.
Setting Up Social Connection in Clerk Dashboard
To enable a social connection provider, go to the Clerk Dashboard, select your Application, and navigate to User & Authentication > Social Connections. Social connection configuration consists of the following steps:
- Enable the providers you want to use.
- (production instances only) Enter your OAuth credentials (Client ID and Client Secret) for each provider
- (production instances only) Copy the
Authorized redirect URIfrom the Clerk Dashboard to the provider's app configuration.
Clerk supports multiple providers, but for the purposes of this guide we will enable social connection with Google.
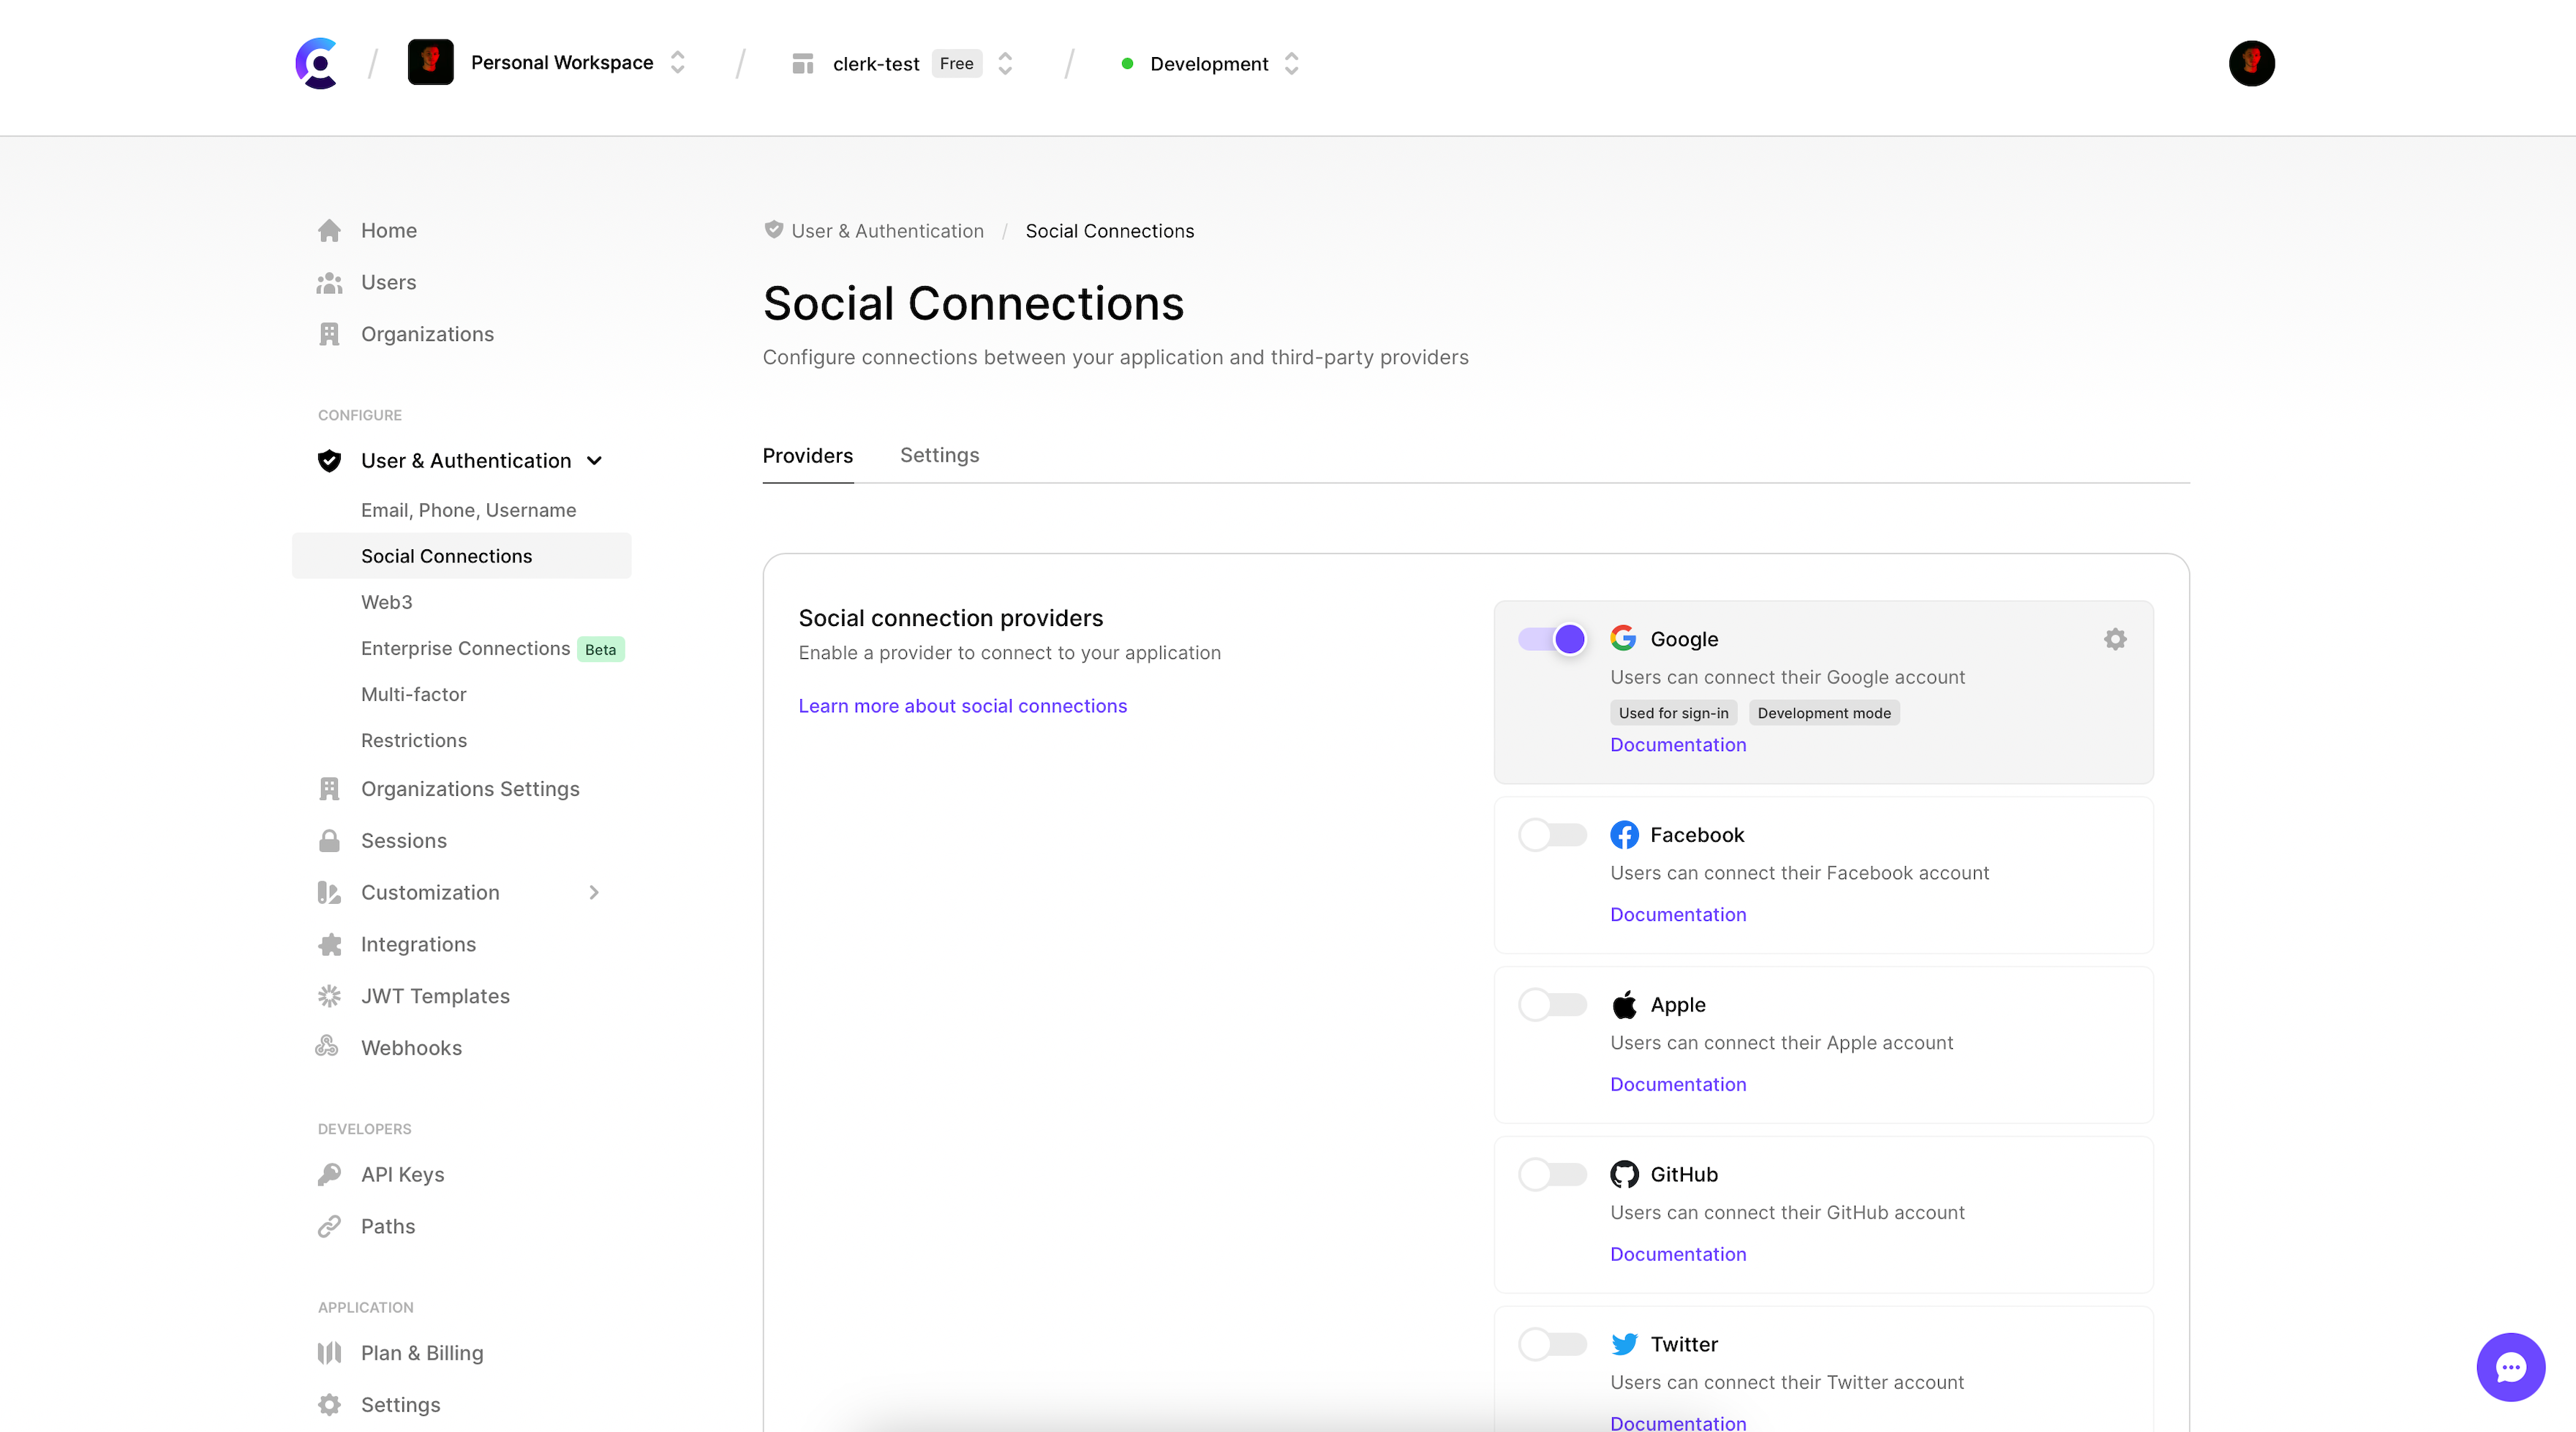
In development, after applying these changes, you're good to go! To make the development flow as smooth as possible, Clerk uses pre-configured shared OAuth credentials and redirect URIs.
Using shared OAuth credentials should not be treated as secure and you will be considered to operate under Development mode. For this reason, you will be asked to authorize the OAuth application every single time. Also, they are not allowed for production instances, where you should provide your own instead.
Creating the Social Sign Up Page
You can start with a blank sign-up page (app/sign-up/[[…sign-up]]), described above in the section Implementing Magic Links in Next.js Using Clerk.
1. Import the dependencies:
"use client";import { useSignIn } from "@clerk/nextjs";import { OAuthStrategy } from "@clerk/nextjs/server";
2. Create a functional component with some hooks:
export default function SignInOAuthButtons() {const { signIn } = useSignIn();}
3. Next, create a method that will handle the single-sign on (SSO) process:
const signInWith = (strategy: OAuthStrategy) => {if (signIn) {return signIn.authenticateWithRedirect({strategy,redirectUrl: "/sso-callback",redirectUrlComplete: "/",});}};
4. And finish it off with rendering a simple button for signing up:
return (<div><button onClick={() => signInWith("oauth_google")}>Sign in with Google</button></div>);
Creating a Single-Sign On (SSO) Callback in Next.js
Single Sign-On (SSO) streamlines user access across multiple services, providing a centralized and more efficient authentication process.
In this section, you’ll create an SSO callback using a very simple component from Clerk.
1. Create a new folder sso-callback in the app folder (so app/sso-callback).
2. Create a new file page.tsx in that folder (so app/sso-callback/page.tsx).
3. Import a dependency:
import { AuthenticateWithRedirectCallback } from "@clerk/nextjs";
4. Finish it off by returning a Clerk redirection component - AuthenticateWithRedirectCallback, used to complete an OAuth flow:
export default function SSOCallback() {// Handle the redirect flow by rendering the// prebuilt AuthenticateWithRedirectCallback component.// This is the final step in the custom SAML flowreturn <AuthenticateWithRedirectCallback />;}
Testing the Social OAuth Flow Integration
Let’s test the social integrations by starting up the Next.js app with the following command:
npm run dev
Navigate to http://localhost:3000 in the browser and you’ll be presented with a button Sign in with Google.
Press the button and you will be redirected to the Google OAuth. Select an account you want to use.
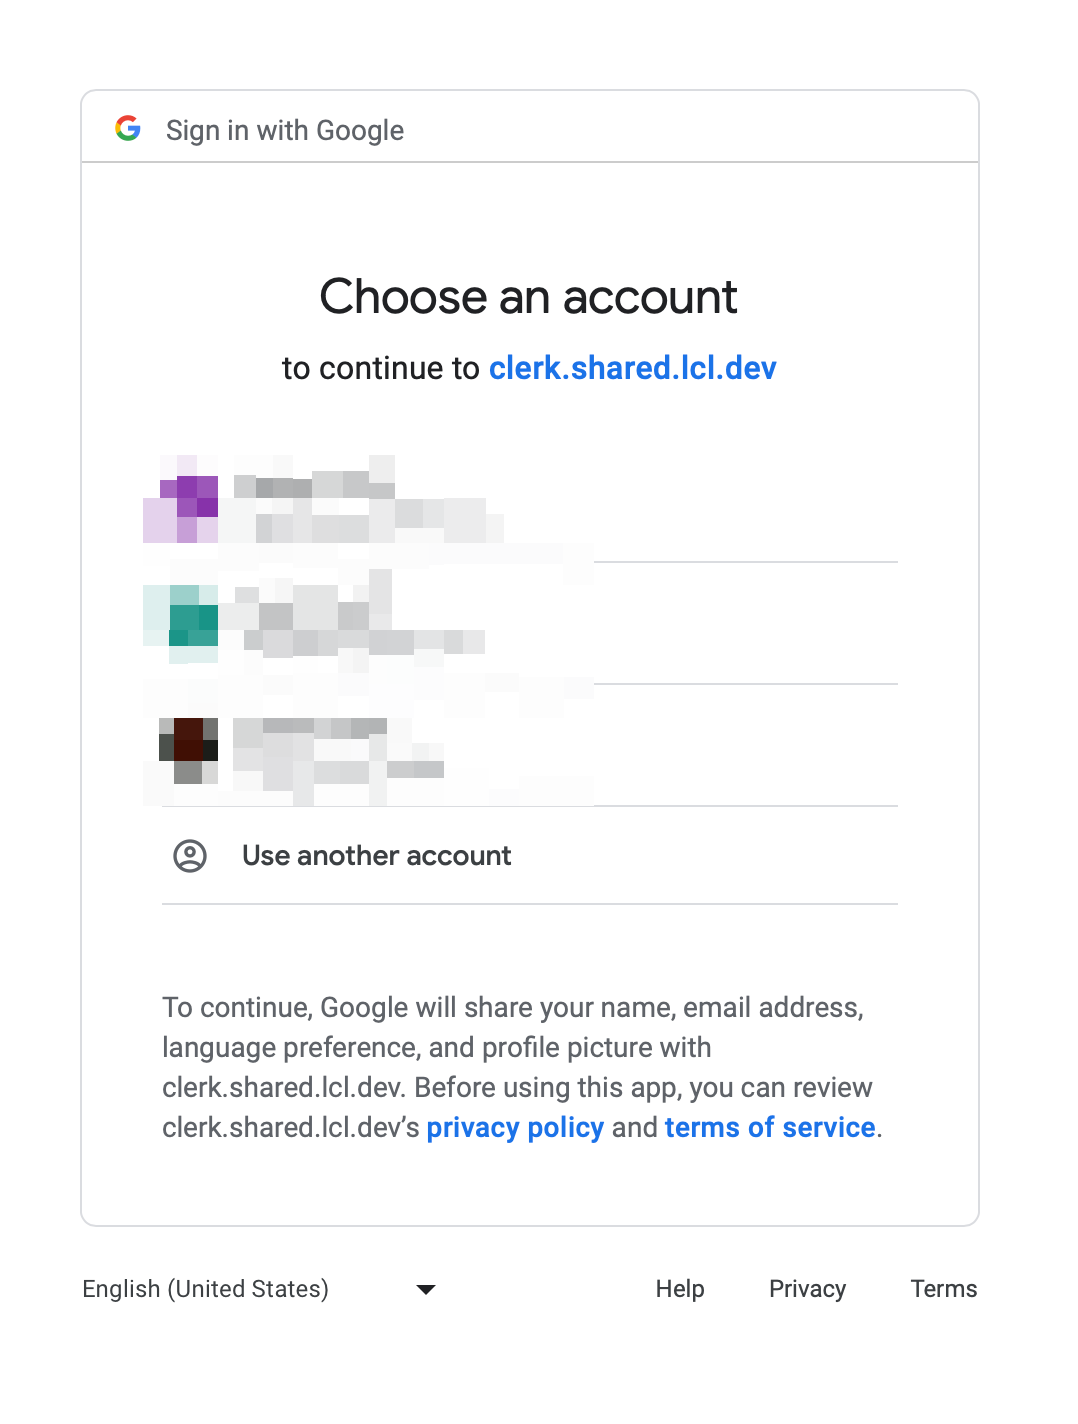
After successful authentication, you will be redirected to the user page.
Implementing SAML SSO in Next.js Using Clerk
The Security Assertion Markup Language (SAML) is a pivotal standard for Single Sign-On (SSO) implementations, offering secure and efficient user authentications across different services.
Mostly used by B2B companies, it allows companies to utilize one set of credentials across all of their tools.
This section will cover how to integrate SAML SSO in the Next.js, using Clerk.
Setting Up SAML SSO in Clerk Dashboard
To enable a social connection provider, go to the Clerk Dashboard, select your Application, and navigate to User & Authentication > Enterprise Connections.
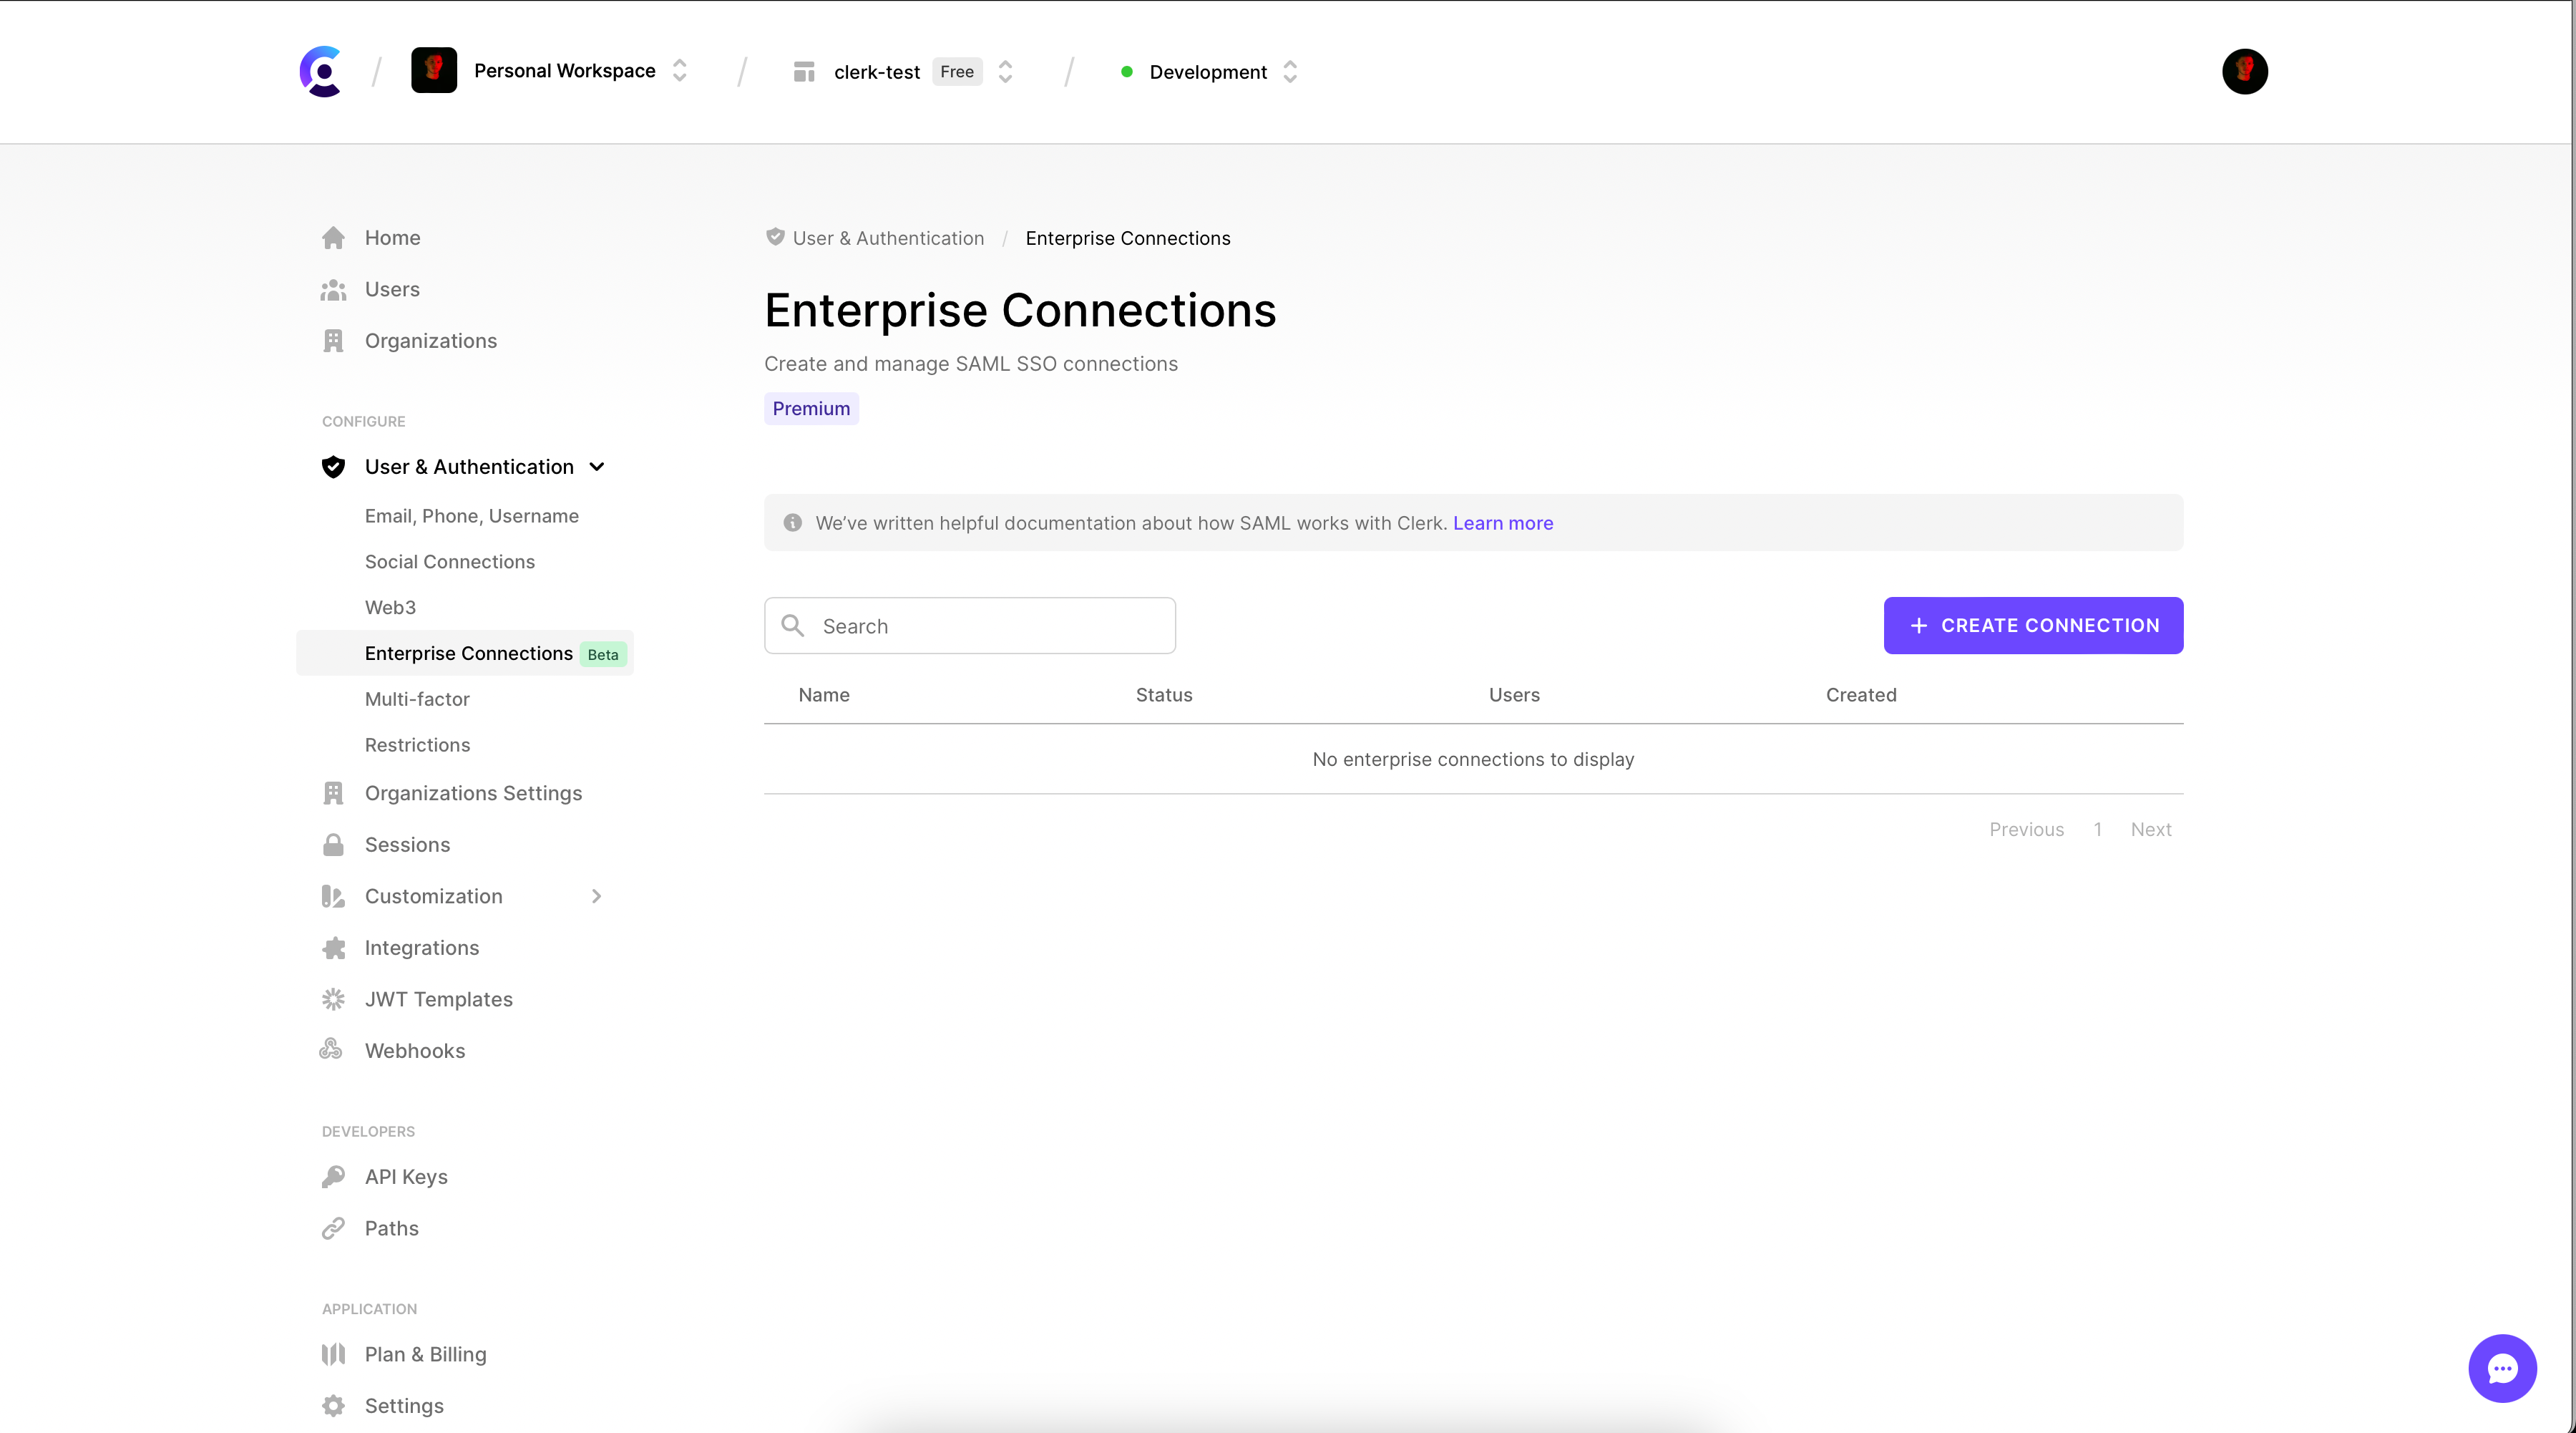
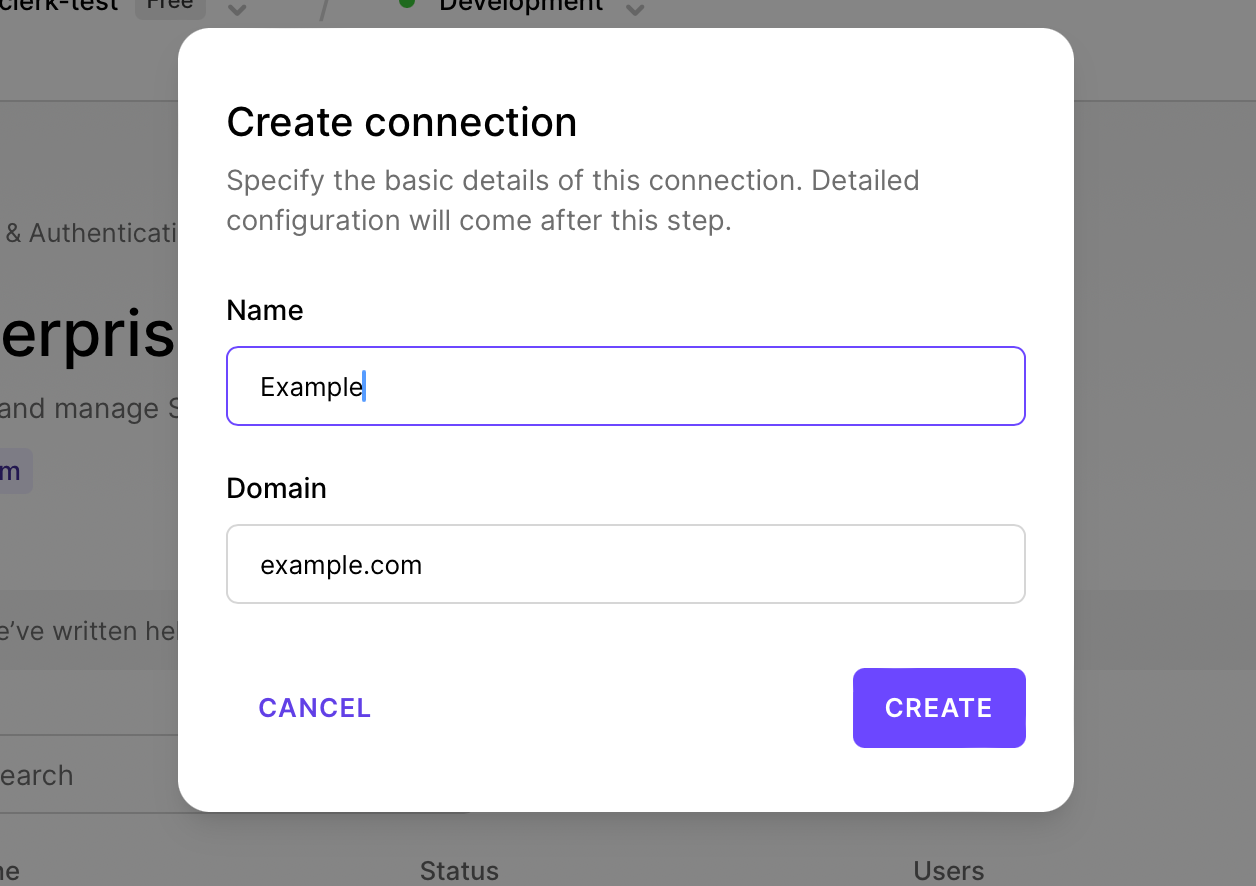
Then, press + Create connection. Enter the name and the domain for the connection.
Go to the newly created connection and perform the setup.
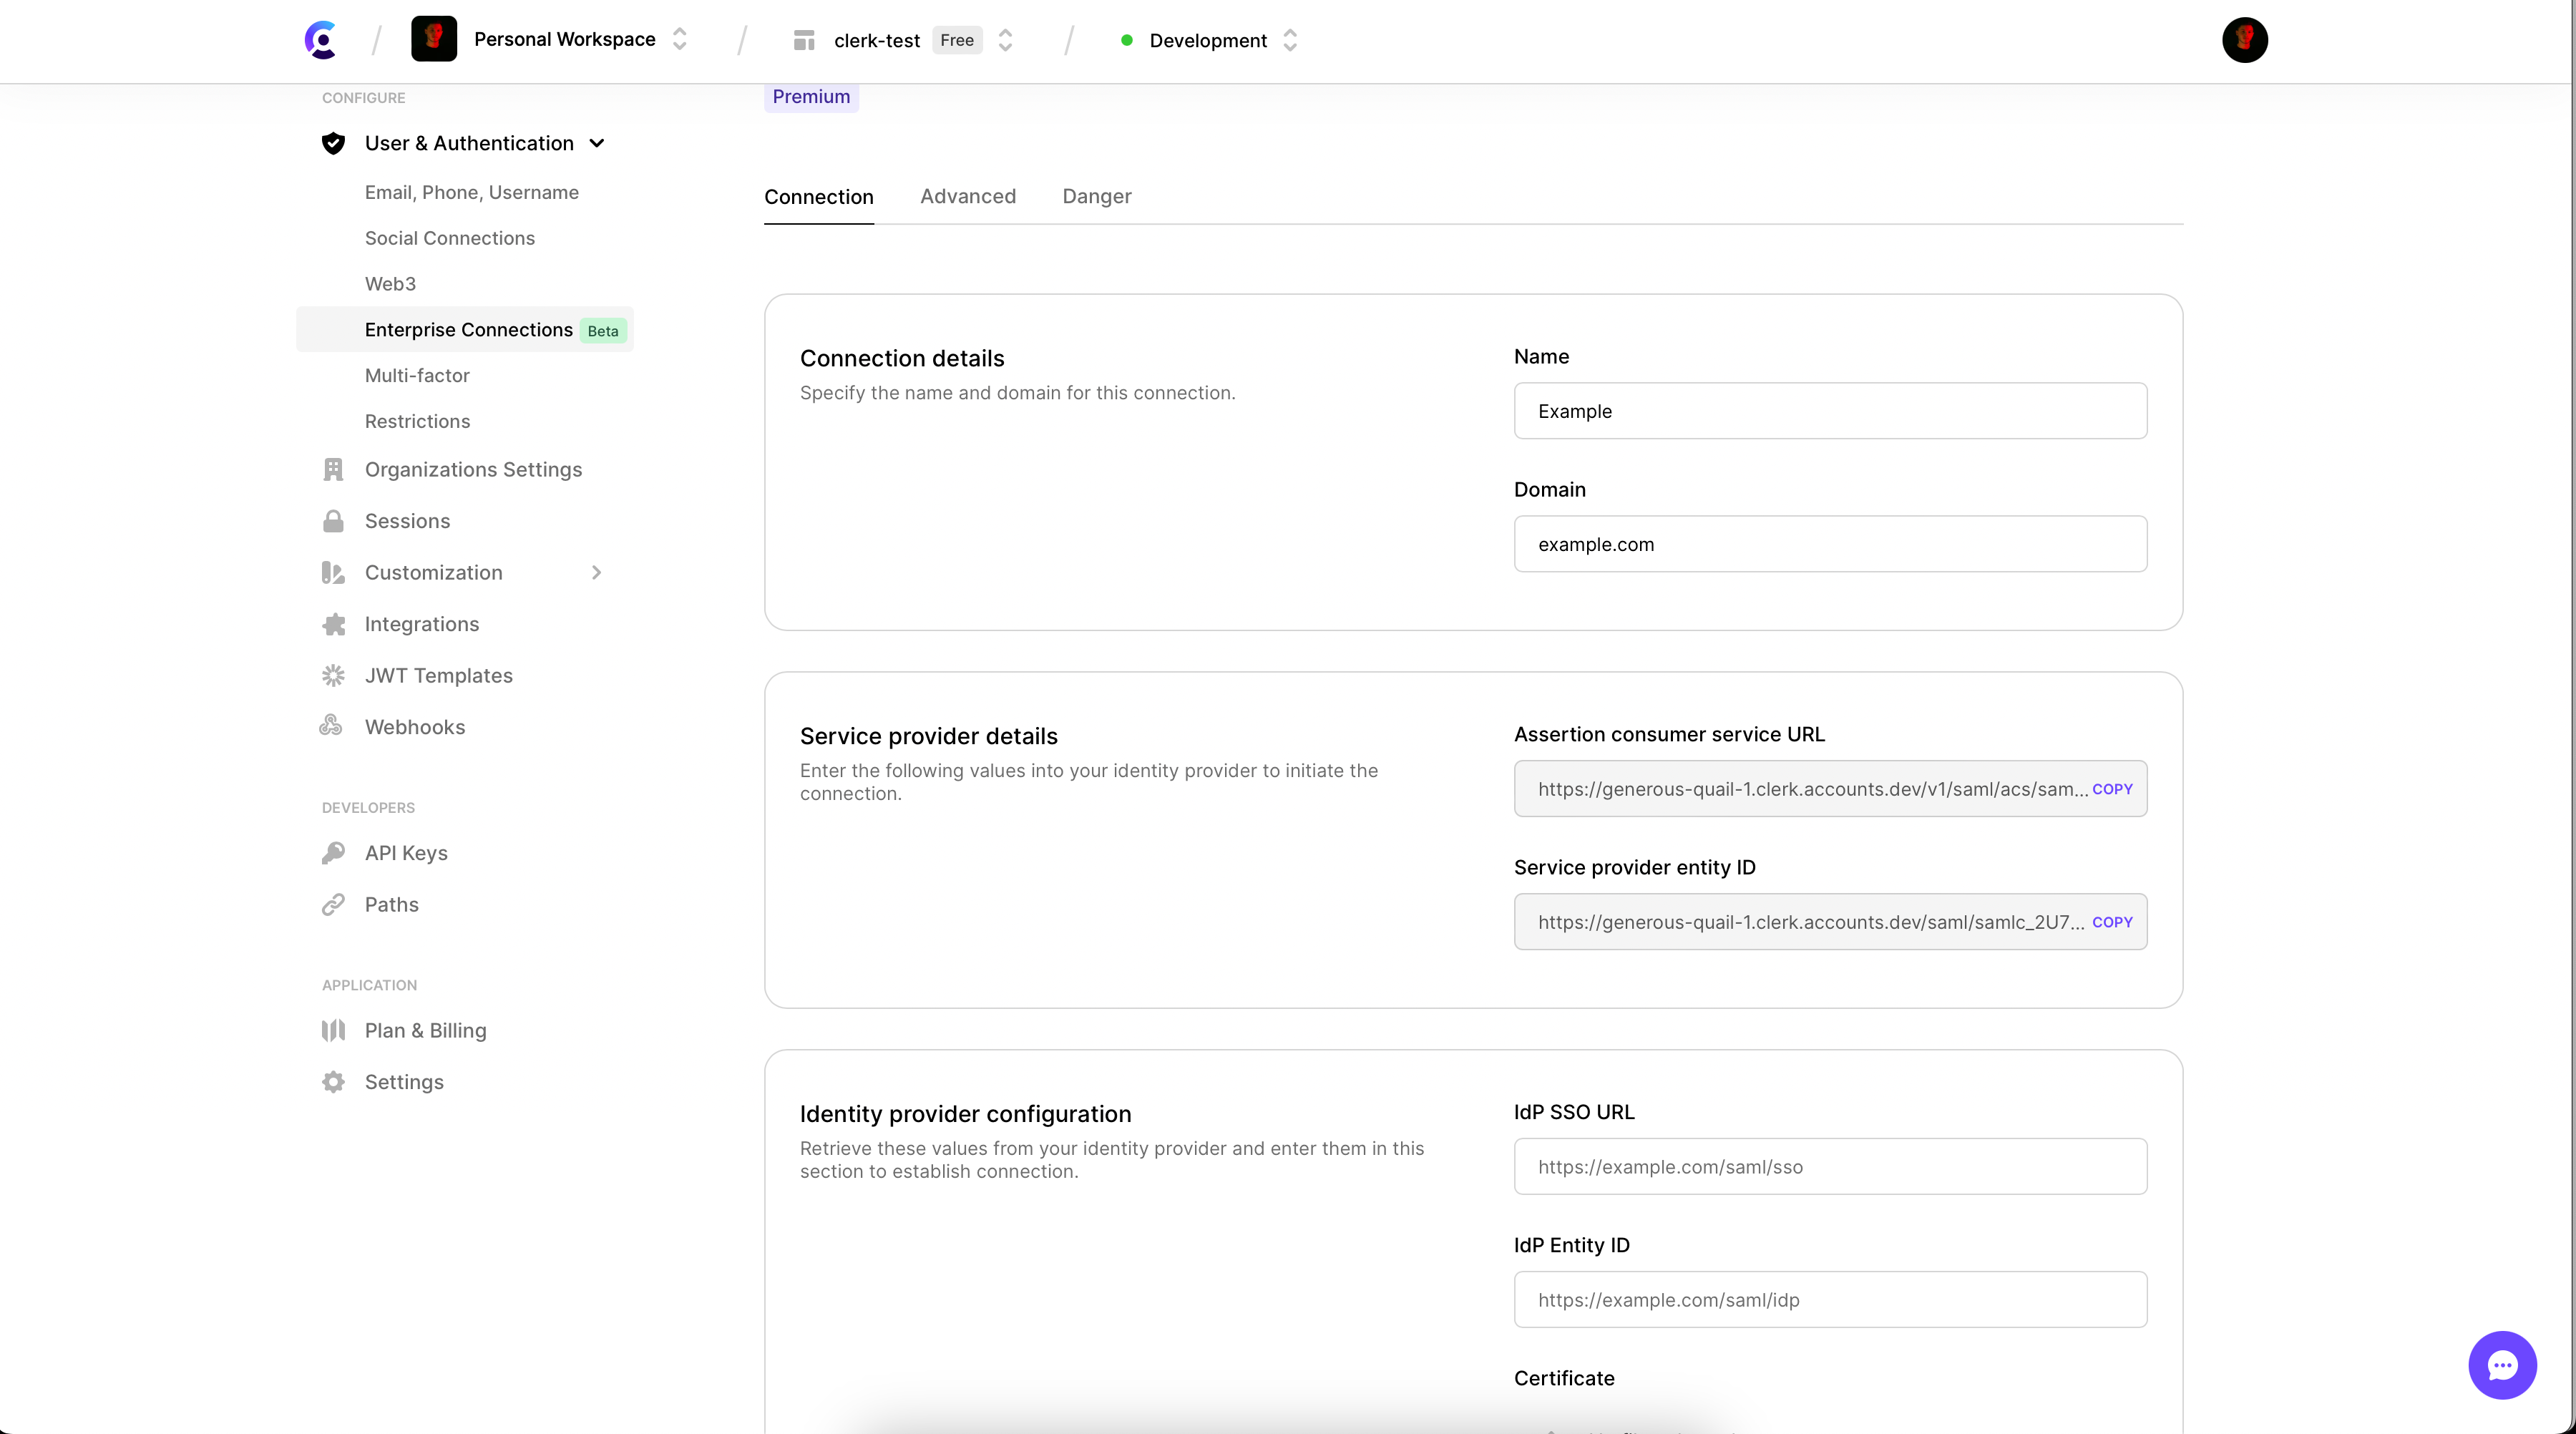
Here, you can assign the Identity Provider (IdP) SSO URL, IdP Entity ID and the certificate.
Creating the SAML Sign In Page in Next.js Using Clerk
Creating the SAML sign in page is very simple. We will tweak the OAuth page slightly and should get a working SAML sign in page.
Here’s the OAuth page code, let’s see what we need to change.
"use client";import { useSignIn } from "@clerk/nextjs";import { OAuthStrategy } from "@clerk/nextjs/server";export default function SignInOAuthButtons() {const { signIn } = useSignIn();const signInWith = (strategy: OAuthStrategy) => {if (signIn) {return signIn.authenticateWithRedirect({strategy,redirectUrl: "/sso-callback",redirectUrlComplete: "/",});}};// Render a button for each supported OAuth provider// you want to add to your appreturn (<div><button onClick={() => signInWith("oauth_google")}>Sign in with Google</button></div>);}
1. We need to change the strategy import { OAuthStrategy } from "@clerk/nextjs/server" to import { SamlStrategy } from "@clerk/types";
2. Also the signInWith method:
const signInWith = (strategy: SamlStrategy) => {if (signIn) {return signIn.authenticateWithRedirect({identifier: "email_goes_here",strategy: strategy,redirectUrl: "/sso-callback",redirectUrlComplete: "/",});}};
3. And finally the parameter in the button onClick handler:
return (<div><button onClick={() => signInWith("saml")}>Sign in with SAML</button></div>);
Next Steps and Resources
In this guide you’ve learned how to implement three major methods of passwordless authentication – magic links, social OAuth and SAML SSO, using Clerk - an advanced user-management platform.
Have an issue within the code? Refer to the extensive documentation.
Continue by implementing reCAPTCHA in React. Maybe skip Next.js middleware for static and public files? Or find your next project idea on Clerk’s blog.
Start now,
no strings attached
Start completely free for up to 5,000 monthly active users and up to 10 monthly active orgs. No credit card required.
Pricing built forbusinesses of all sizes.
Learn more about our transparent per-user costs to estimate how much your company could save by implementing Clerk.
Newsletter!
The latest news and updates from Clerk, sent to your inbox.